3D Printers

Professional Engineer & PE Exam Forum

Help Support Professional Engineer & PE Exam Forum:

This site may earn a commission from merchant affiliate links, including eBay, Amazon, and others.

Supe

Well-known member
Joined
Jul 17, 2008
Messages
14,053
Reaction score
3,796
Location
.
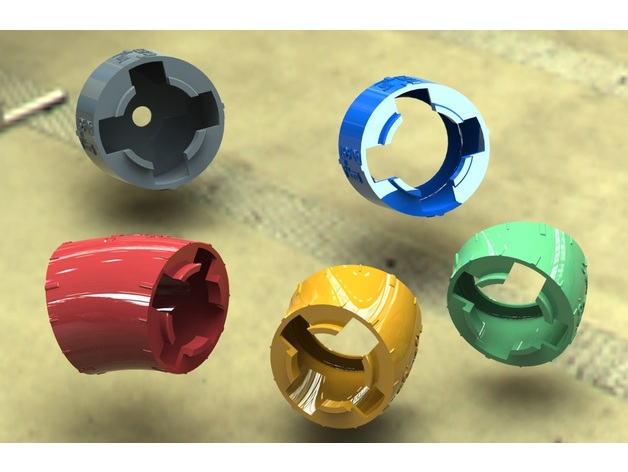
Any 3D printer users on board?  Starting to look at some options for a 300x300x300mm printer in the sub-$500 range.  Intended purpose is mostly small clamps/brackets/housings for parts for the race car, but also some building block style header mockup parts:

b5e0b2d5fc83a0400cab87bdae62614d_preview_featured.JPG


Any recommendations?  I've looked at the Creality CR-10, the Anycubic i3 Mega, and the Creality Ender 3, but everything at that price point has completely polarizing reviews until you get into the smaller beds.  I really want that 300mm capability (at least width, could deal with shorter height) in order to make some glare hoods/brackets for some parts that are at least 8-10" in length.

 
I have a Solidoodle 2 that has an 8" cubed build envelope.  It's pretty old, though, so the technology has advanced quite a bit in the 6ish years I've owned it.  If I used it more, I would probably be looking to get a new one.  My only contribution to this discussion is that I would not use any 3d printed part as a structural element in a car.  They are fine for prototyping and mock-ups, but I wouldn't consider them structurally sound at all.

 
No, nothing structural.  These would be parts like go-pro mounts for the roll bar, a sun/glare visor for the digital dash, wire loom separators, etc.  The "kit" for those mock up blocks I showed above run nearly $1000 for a set for each tubing diameter, so that's where the ROI comes in.  

 
I've looked at the Creality CR-10, the Anycubic i3 Mega, and the Creality Ender 3, but everything at that price point has completely polarizing reviews until you get into the smaller beds. I really want that 300mm capability (at least width, could deal with shorter height) in order to make some glare hoods/brackets for some parts that are at least 8-10" in length.
I just got a Creality CR-10S in my lab. It had a thermal runaway at the hot end, and ignited whatever it was printing. I think Creality enables thermal runaway protection by default in their firmware already, so it was probably user error for uploading new firmware with the protection disabled.
 
My 13 y/o really wants a 3d printer. I have no idea what we would us it for.
 
My 13 y/o really wants a 3d printer. I have no idea what we would us it for.
If your son has any interest in modeling, industrial design, or mechanical engineering, a 3D printer would probably be good for him. When you first get started in learning CAD, it can be pretty abstract. But if you are able to design something and have the ability to print out a prototype in the same day, it de-mystifies the design process.
 
If your son has any interest in modeling, industrial design, or mechanical engineering, a 3D printer would probably be good for him. When you first get started in learning CAD, it can be pretty abstract. But if you are able to design something and have the ability to print out a prototype in the same day, it de-mystifies the design process.
She's actually more interested in printing D&D characters. I would TRY to use it to print stuff for amateur radio.
 
If she's only interested in using it to print D&D minis, look into one of the small resin printers, e.g. the ELEGOO Mars. They can be had for under $200 now, and will produce much finer detail than the PLA printers can do at that scale. Heck, you can get a Monoprice MP Mini on sale for $169.
 
My only input is that the resin cartridges can get outrageously expensive compared to PLA, and have a limited shelf life where as the filament spools last a lifetime. Just something to consider.

I run the FormLabs Form 2 and have almost every resin in their line. I dropped close to $3k on resin back in 2018, and haven't opened 90% of them yet due to a move. Their message boards are filled with Q&A regarding shelf life, so I'm hoping I can "shake" them back to life or it was all for nothing.
While this is true, there really is no comparison on the small scale stuff. You flat out cannot get the detail in miniatures with PLA. I print a lot of stuff in maybe 2X scale from what are normal miniature sizes for something like D&D, and to prep them acceptably for paint, it takes a LOT of work, with lots of detail lost in the sand/smooth/prime process. I would be much more hesitant regarding consumable loss if talking a large format printer vs. the 3" print bed jobbers.

And while there's no theoretical shelf life on PLA, if its been sitting around forever, at a minimum it will need to be baked to dry it out with mixed results.
 
I agree on print quality. There's is a free downloadable model benchmark boat called "Benchy" I printed to compare with a co-workers Ender3. There was a clear distinction in resolution with SLA.
Here's one of the tap handles I've designed and printed:
LLBC Tap Handle.jpg
 
She's actually more interested in printing D&D characters. I would TRY to use it to print stuff for amateur radio.
Apologies for assuming your 13 y/o was a male. I agree with @Supe that resin printers are better for miniatures. It's hard to get much detail on a small model using FDM. But tagging on to what @pbrme said, not only is resin more expensive, it's also messier and toxic if it gets on your bare hands. I'd have to have a large application to pull the trigger on a resin printer. FDM is just easier.
 
Apologies for assuming your 13 y/o was a male. I agree with @Supe that resin printers are better for miniatures. It's hard to get much detail on a small model using FDM. But tagging on to what @pbrme said, not only is resin more expensive, it's also messier and toxic if it gets on your bare hands. I'd have to have a large application to pull the trigger on a resin printer. FDM is just easier.
No apologies needed.

I like HeroForge.com for miniatures. Sounds like it's a better deal than printing our own. I know if I bought a 3d printer, it would sit on the desk not getting used.
 
So, I unintentionally acquired a resin 3D printer. It was another work freebie. It's a Peopoly Moai, laser SLA printer. The client said it was involved in a fire, but I didn't find anything wrong with it during my study. They gave us notice to dispose of the evidence, so I disposed of it into my basement. I bought the $200 resin starter kit from MatterHackers (a few sample resins, tool kit, silicone mat, and UV curing box). I'm just running the test prints recommended by Peopoly, and everything seems to be going fine. Resin is a pain in the ass in terms of mess and post-processing, but this thing is pretty neat. It's absolutely silent while it's running, and the resolution you get on the prints is unbelievable.
 
What kind of post processing is required with resin? I run an Ender 3 so I've got no experience with resin but I've been wanting to get one to do miniatures as well.
 
The print has to be rinsed and lightly brushed with a solvent (IPA or ethanol are commonly used) to remove uncured resin. Then the solvent needs to be washed off with water. Then it's preferable to dry everything. Then the model needs to be exposed to UV light for 5 to 30 minutes (either in direct sunlight or with a UV light) to fully cure the resin. Only then should you touch the model with your bare hands because the uncured resin is toxic.

Basically, you have a vat of liquid resin. The build plate presses into the vat to form a very thin (as little as 5 microns) layer between the plate and the bottom of the vat. A 405 nm laser then traces a layer of your print, partially curing the resin. When the part comes out, it is solid, but any impacts or aggressive brushing can still damage it until the resin is fully cured.
 
The UV light curing process is what gives resins their finished material properties (ie. strength, hardness, toughness, modulus of elasticity... etc.). In my case, the Formlabs line of Engineering resins all vary in these properties (some even having flexible and high temp ratings) which are controlled using the UV light curing box. UV boxes in general are designed to reflect the UV light from all angles, at a set temperature for a minimum recommended time to achieve the resin's rated design properties. You can get close by leaving your part out in the sun, but it takes longer, joints may be shadowed, and property results may vary. The published property tables are based on using the manufacturers curing machine, so I would assume if you don't use the same it's hard to determine if you're still achieving accurate cures. Unless you're in a testing lab and do this for a living.
 
The little Sunlu UV curing box that came with the MatterHackers kit is basically functional. It's only 12 watts max (the power adapter that came with it is only 12v at 1 amp), and the simple timer included with it only goes up to 600 seconds. I have found that sometimes isn't enough curing time or power, so I've just bypassed the timer and I let it run for 30 to 45 minutes.

@pbrme have you found a way to get rid of the cloudy/matte surface finish on the resin after curing? It looks shiny and translucent when I put it in to cure, but it looks dull and powdery once it's cured.
 
@pbrme have you found a way to get rid of the cloudy/matte surface finish on the resin after curing? It looks shiny and translucent when I put it in to cure, but it looks dull and powdery once it's cured.
Well my process involves a couple of dunks in a bath of denatured alcohol, then a wash cycle in the same. The wash machine spins a gentle vortex for around 10 min. Then it sits for a bit and goes into the cure machine. I haven't really noticed a problem with cloudiness but it is definitely a matte finish. Are you printing clear? I have clear resin but haven't tried it yet. I've heard you can use a heat gun after the curing process to smooth out the surface finish, but don't have direct experience with it for resins. I haven't found a need for it yet.

One other note, my machine includes a printed supporting structure to add stability in the build. The supports are attached to the build in multiple nodes which have to be broken away after cure, and sometimes leave either a bump or pit depending on how you remove them. Although resin SLA gives you incredible resolution, there is still a lot of post processing to shave/sand and finish these node attachments. Most of my builds with the Form2 have either been prototypes or sanded and finished with spray enamel.
 
Here's what I mean about the supporting structure.
This is the model of the tap handle I posted a few months ago. I used AutoCAD 360 to build the assembly:
1629907256951.png

Then brought individual parts of the assembly into Formlabs' interface software, which optimizes the orientation and layering for strength, automatically adds the support structure and allows for input on resolution. It calculates the total printed volume, and tracks fill volume in the resin cartridge so you know if you have enough to finish the print without a stall seam. Calculates layers and print time, so you know when to come get it. The way it shows below is upside down. The base blob is what attaches to the inverted build platform.

1629907101398.png
Here is the part freshly pulled out of the resin tank:
1629907763561.png
Finished handle assembly:
1629907605881.png
 
Back
Top